Thursday, January 29, 2015
BE who you wanna BE: SEXYFUCKUPs 18+
BE who you wanna BE: SEXYFUCKUPs 18+: Porno movie plot 101 I had to open storage area for the plumber to drain pipes for the building. After I was done there I headed to my... come and read this - hilarious!
Moving ALL my blogs into ONE place!
To all my faithful readers! I have made a decision to try and keep all of my thoughts in ONE place!
I hope I can succeed in it! I am sure with all the support - I can!
Join me at this page for more EVERYTHING - Makeup, Travel, Thoughts and Naughtiness!
Make all up! page at Be Who You Wanna BE!
See you there!
Kisses!
I hope I can succeed in it! I am sure with all the support - I can!
Join me at this page for more EVERYTHING - Makeup, Travel, Thoughts and Naughtiness!
Make all up! page at Be Who You Wanna BE!
See you there!
Kisses!
Monday, April 21, 2014
Illamasqua Products (the one I bought) Part 2

Picture on the right just to show its sparkle and colours of it.
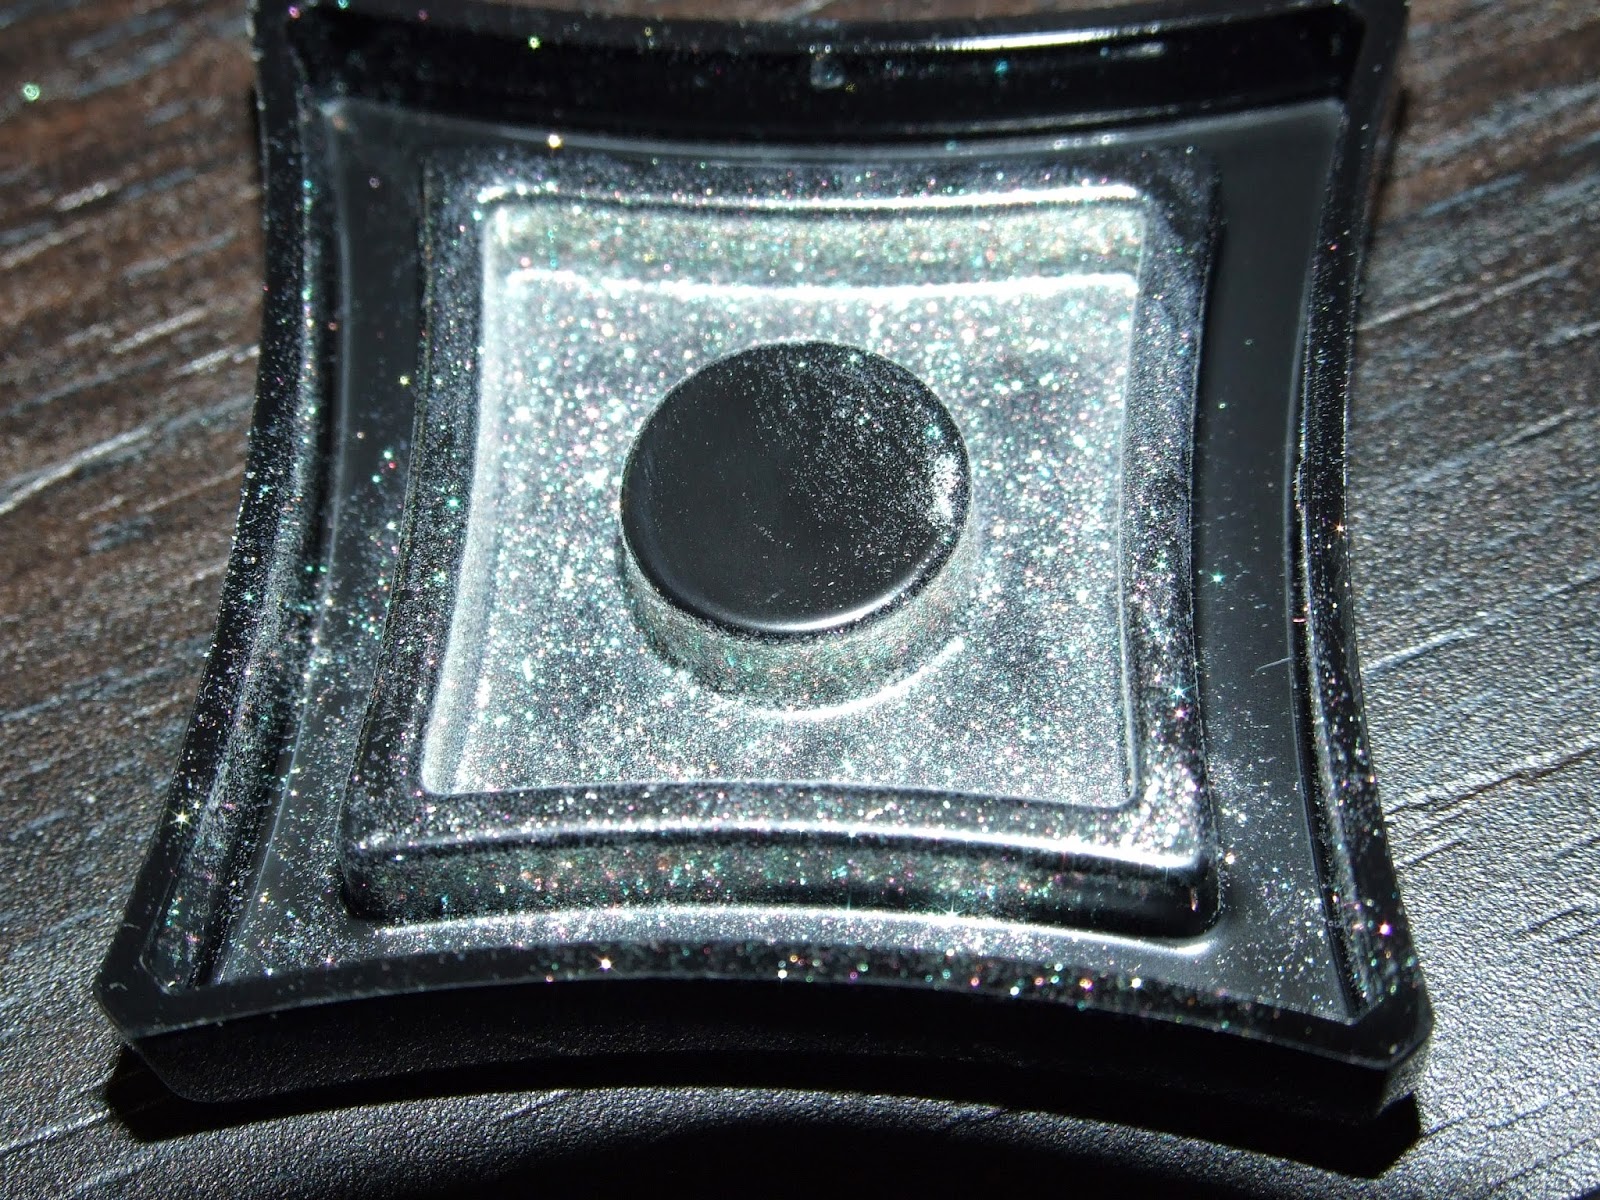
That is the lid full of pigment. The only down side in the packaging is that you need to know how to open it. Otherwise if you put to much pressure it will open and product will go everywhere!

Other than that packaging is absolutely lovely. Soft corners and black glossy tops. Very "glamouresque" )))

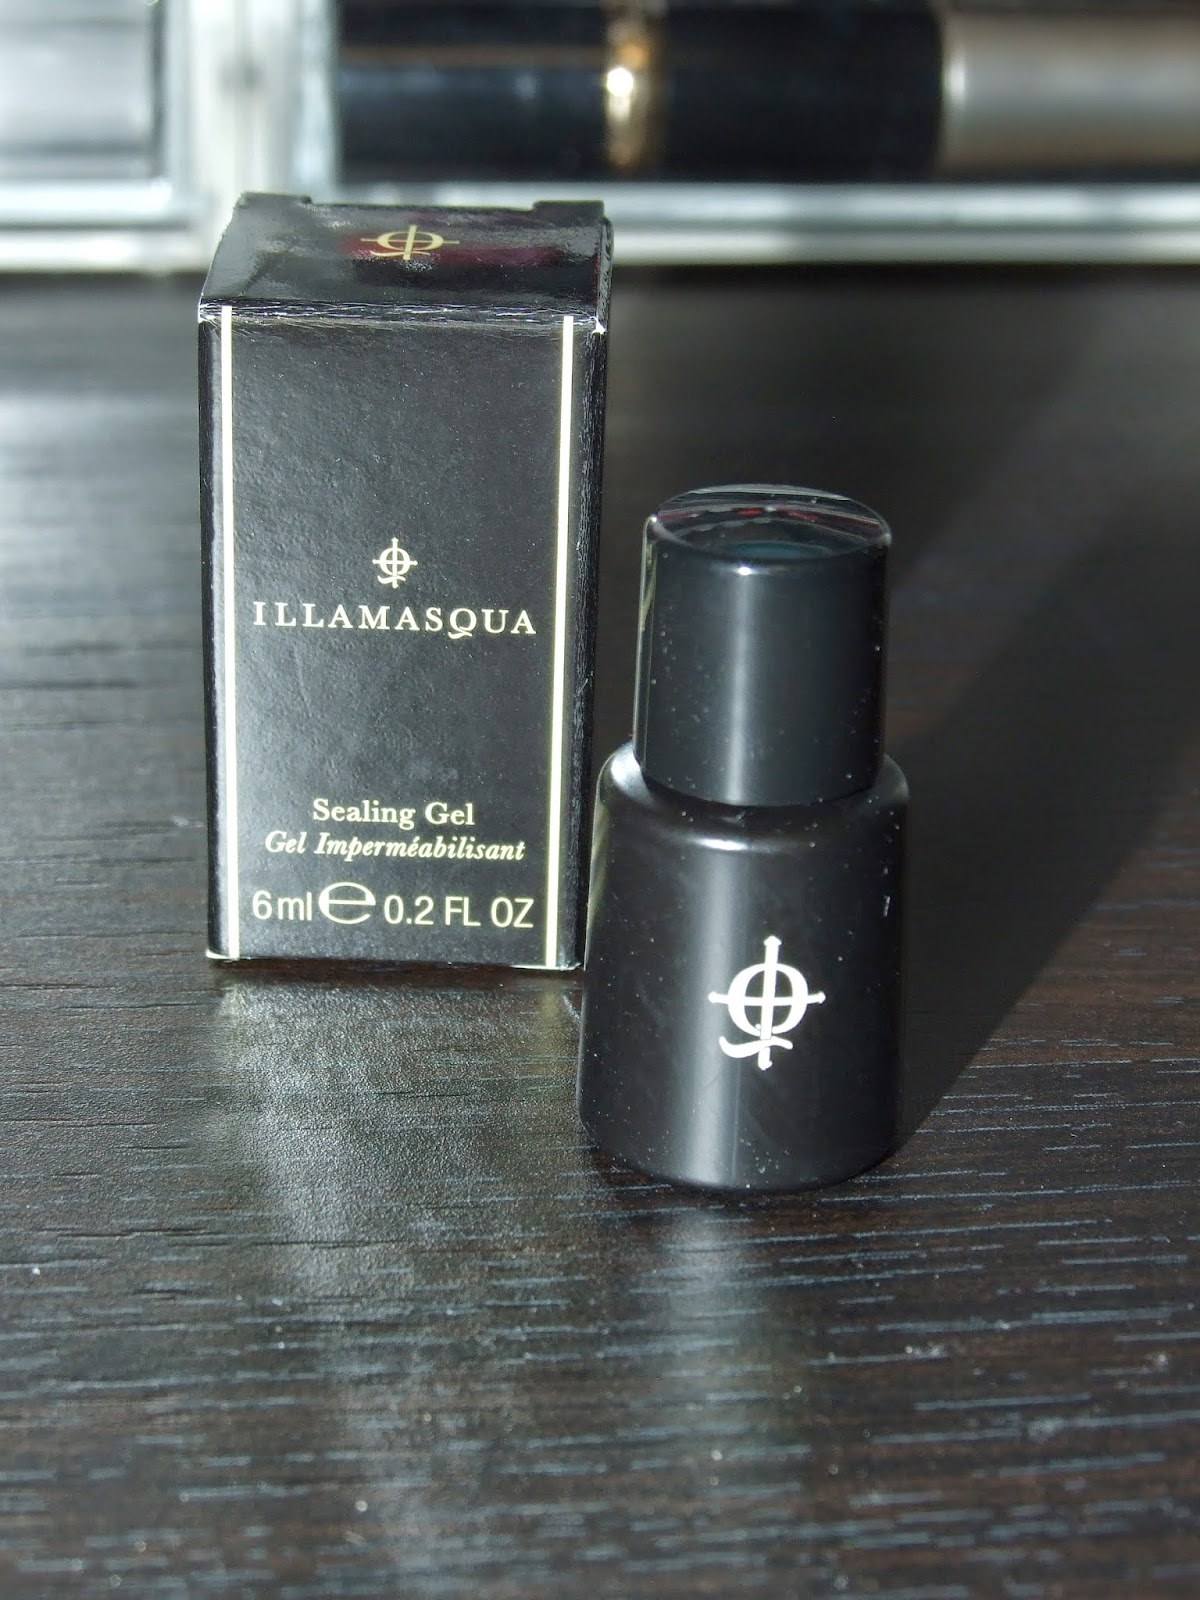
In addition to all powdery products I bought Sealing Gel. It is something absolutely amazing. It transforms any Powder eye shadow, Pure pigment or Eyeliner Cake (one of the Illamasqua eyebrow range product - I did not purchase) into wet paste that will dry and stay in place. Very fun and multipurpose little gizmo. But be careful when using it inside the powder eyeshadow tin.
Just use it in one place (in the corner of an eye shadow) as this gel does create a thin layer and it would harden and need to be removed anda lot of product will get wasted.

 In the pictures below you will see the difference in between wet and dry application. I used pure pigment from Illamasqua in "Beguile" and eye shadow #84 from Inglot cosmetics.
I must add that Inglot as well has similar formulation called Duraline that transforms powder into liquid but it does not stays very long. Perfect for photo shoots but for a long day without touch up it will not last. I will test Sealing gel from Illamasqua and report about it's longevity. But on the hand it was not moving.


 |

 I did manage to squash package with products a little - but only box did suffer a little. Gel is packed in glass. Sleek and lovely.
And last but definitely not least products I got for lips. Three lipsticks and one Lip Crayon. You guys should try these lipsticks! Staying power is amazing. Colours are needed to be seen. And what I love the most - they are mat. So if you need you can add gloss or different colour shine. But base is mat and stays well.

Lip Crayon in colour "Media"
www.illamasqua.com/shop/products/lips |

On top - Lipstick in "Shard" - rich plumy colour.
On the left lovely classic red lipstick. The one that never goes out of style. Colour "Box".

This bright pink does not photograph well enough to show it's brightness and how well it is saturated with colour.
I even keep them separately as I like to play with them more often ;)

This was my first purchase with Illamasqua and I can tell you for sure it is not the last. I am already craving more and know for sure that this is the brand can always surprise you with something new and surreal.
Keep it up guys!
And for the one who does read me please go and check their website (they ship Worldwide) and if you have any questions - do ask! http://www.illamasqua.com
Love and Peace to all,
Irina
Sunday, April 6, 2014
Illamasqua Products (the one I bought) Part1
It was an absolute pleasure to be part of Illamasqua during 3 days course in London and the result of my week in London was not only my lovely Certificate from Illamasqua(which I've gotten two of). But lovely bag with products I have bought with help of all team at Illamasqua Beak street store. Massive huge "Thank you, guys!"
I only have one regret - I did not get another cream pigment in Androgen but online Illamasqua.com it there to help ;)
Enough talking it is time to share my beauty finds:
1) First stop is an awesome primer called "Hydra Veil" - the meaning is in the name. It is wet, nourishing at keeps make up in place. What more do you need from primer? And as I know it does not run off the combination and oily skin types as well. Most of the time you get one or another.

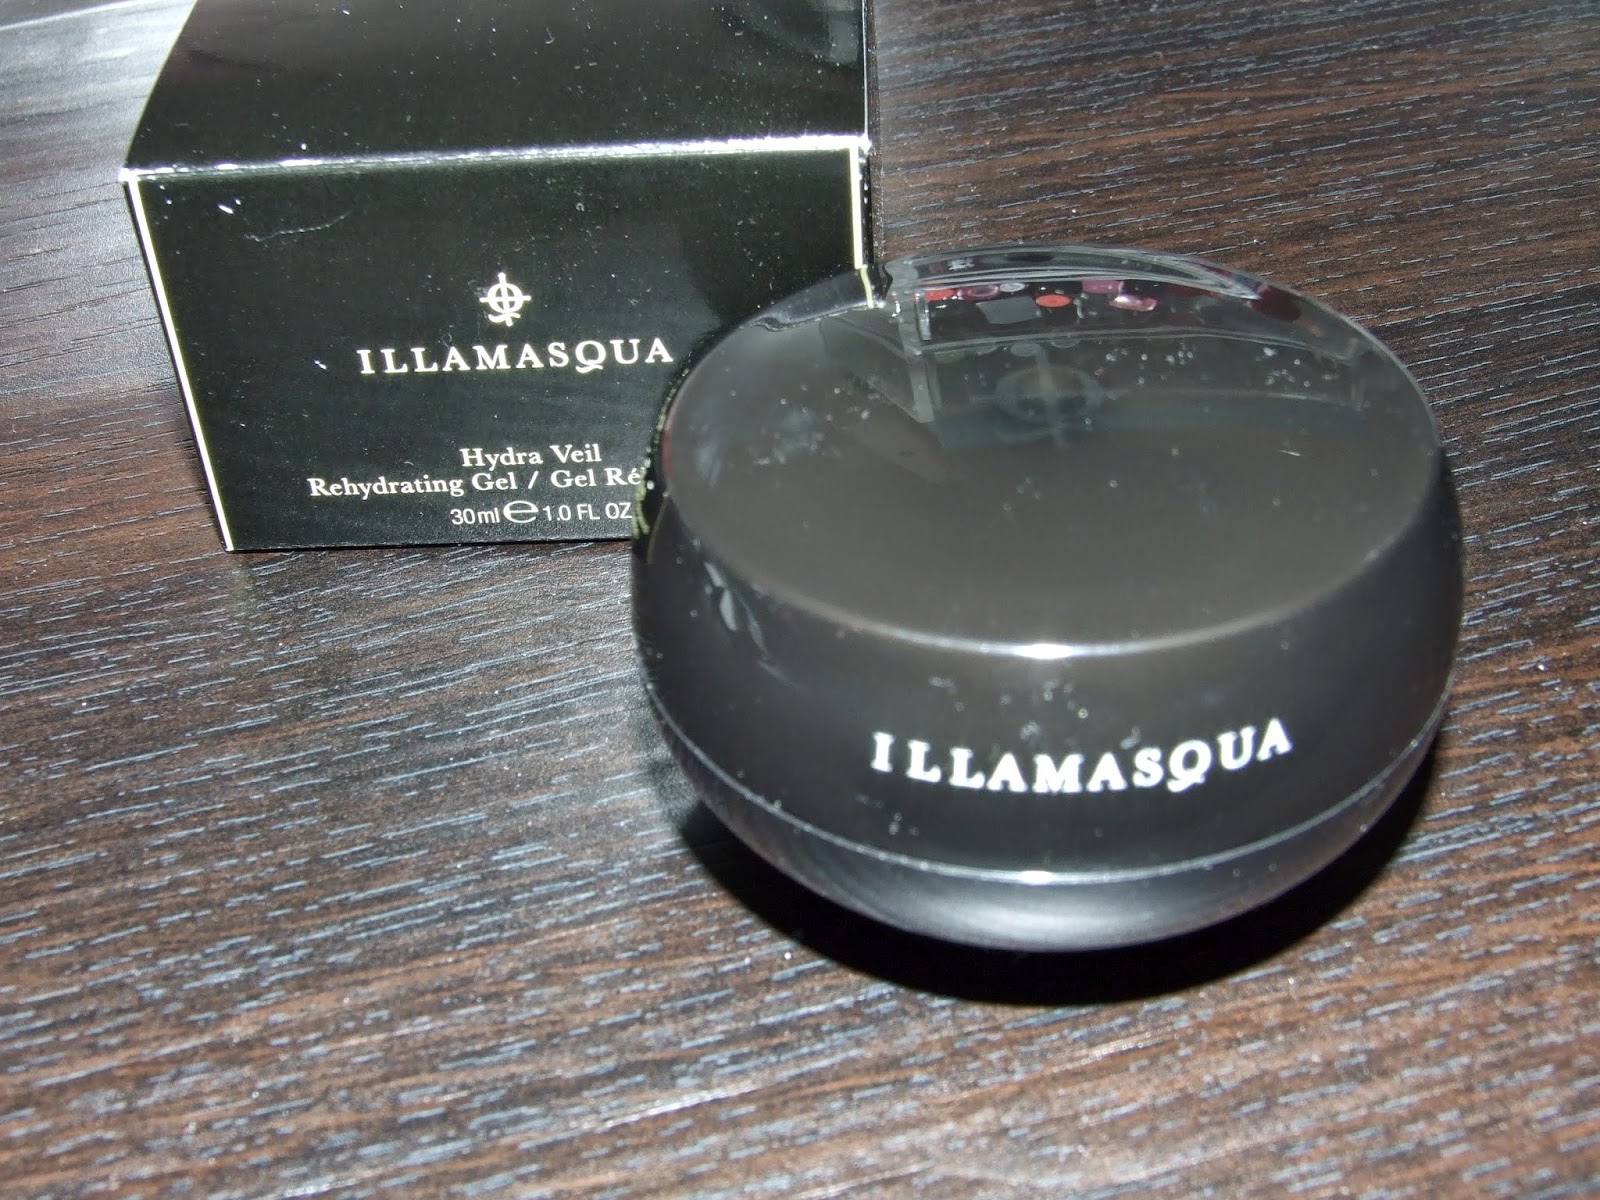 It has no added odor which absolutely great for the sensitive skin types and the one of us who can not stand any added smell to their products.
When top lid is removed it reveals tiny spoon with the one you grab some of the product and smooth all over you face and neck. It will absorb almost immediately leaving you with non-greasy moisturized feeling on the face and perfect canvas to lay your make up on.


My colour Skin Base foundation #6. As you can see if I would blend it in on my hand you would not be able to see it.
And of course for any other skin tone lovely man (unfortunately I do not remember his name, as there were 3 man at Illamasqua Beak Store: one is our lovely teacher Ben, second one is lovely grumpy man with beard and different colour eyebrows and the third one is the one and only who convinced me to have my SB and explained how to get to Brewer Street) gave me a Skin Base Mixer in White and Amber. That would give me an expansion to my skin base palette and the ability to work with different skin tones. And considering that in my country there is not many girls with darker skin tones (unfortunately) - I should be OK and be able to match any Client.


 As to give any complexion a spring warmth you need to get a Limited Edition Illamasqua Skin Base Foundation in shade: Au (as in Aurum - Gold..remember Chemistry? =)) It is an amazing way to give yourself or your Client and instant light tan. Goes amazingly for the brides who usually get spray tanned and face washes off and you need to match face with body... Almost invisible specks of gold would give great highlight as well.


Next step is a concealer Skin Base Lift - brightening concealer in colour Light 2 - it matches my skin tone immaculately.


If you are going to use cream blusher - use it now or Cream Pigment in my case in colour Hollow which can be used on your eyes, lips, face and body. As a contour, base for your eye shadows or create a lovely nude lip. Other colours presented at the store and web -site are fun and creative and has a strong staying power.


Absolute must have is a translucent Loose Powder that does not give a flash back! It is a must for wedding, photo shoots and every day use. It comes with puff and in 15g package.


If I could I would buy every single thing in the store and play with them all days long. But at the day of shopping I had to choose and decided to get myself a lovely eye colouring pencil in Navy and eye shadow in Burst to match.


I only have one regret - I did not get another cream pigment in Androgen but online Illamasqua.com it there to help ;)
Enough talking it is time to share my beauty finds:
1) First stop is an awesome primer called "Hydra Veil" - the meaning is in the name. It is wet, nourishing at keeps make up in place. What more do you need from primer? And as I know it does not run off the combination and oily skin types as well. Most of the time you get one or another.
When top lid is removed it reveals tiny spoon with the one you grab some of the product and smooth all over you face and neck. It will absorb almost immediately leaving you with non-greasy moisturized feeling on the face and perfect canvas to lay your make up on.
Next step is a base. I have to admit that during the course I did not felt real advantage of the foundation we were using. It seamed a bit heavy to me. But funny enough it did not feel that way on a skin. So when I was doing my shopping in the end of the course I was reluctant to get one. But, boy I am so glad I did!
It does give your face an airbrushed effect and you have one long lusting perfect complection without looking or feeling heavy.
And of course for any other skin tone lovely man (unfortunately I do not remember his name, as there were 3 man at Illamasqua Beak Store: one is our lovely teacher Ben, second one is lovely grumpy man with beard and different colour eyebrows and the third one is the one and only who convinced me to have my SB and explained how to get to Brewer Street) gave me a Skin Base Mixer in White and Amber. That would give me an expansion to my skin base palette and the ability to work with different skin tones. And considering that in my country there is not many girls with darker skin tones (unfortunately) - I should be OK and be able to match any Client.
Next step is a concealer Skin Base Lift - brightening concealer in colour Light 2 - it matches my skin tone immaculately.
If you are going to use cream blusher - use it now or Cream Pigment in my case in colour Hollow which can be used on your eyes, lips, face and body. As a contour, base for your eye shadows or create a lovely nude lip. Other colours presented at the store and web -site are fun and creative and has a strong staying power.
If I could I would buy every single thing in the store and play with them all days long. But at the day of shopping I had to choose and decided to get myself a lovely eye colouring pencil in Navy and eye shadow in Burst to match.
I will return to share more !
Tuesday, March 18, 2014
Illamasqua, baby!
I can not think of a better opportunity than now to talk about the best experience in my carrier as a Make up Artist so far.
I just came back from London after taking Vintage Glamour Course at Illamasqua School of Make Up Art and I just loved it!
New people, new products, new textures...and it all combined into new knowledge. I can not wait to experiment with all the products I've bought (believe it or not I would take one of everything if I could) applying all new I've learned and making it wearable for everyday life.


But the best part of it all is the fact I got to spend 3 days with people who are like me! We have one major thing in common and it is our passion for Make up. It had no difference where are you from, how good or bad your English is....Everybody understood and shared each others interest. We wanted to learn how make up transformed into what it is now and WE DID!
We started from 1920's where Great Depression, silent movies and the fact that make up just only became available to women played significant role in what we could see on a woman face of that era.

I had great pleasure to be a model for that era. And believe it or not but had a funniest time walking around London Soho with half of my face done...People would stare, laugh, frown...it did not matter!

After lunch we had to practice what we were shown...It was not easy as you'd imagine but when you succeed it does feel great.
Thank you to lovely teacher, Ben, he had patience to guide everyone of us and we all did fantastic.

Next we moved on to 1930's where Depression look has been removed by happy faces and where starting point for Glamour of 1950's ...


You can see how eyebrows can change your whole appearance in seconds...Amazing!
1940's were a transition period for 1950's glamour.


We had an amazing model for 1950's Andrea De La Cruz she is a young Make up Artist from California. Has a beautiful face and very good skills. But when Ben did a tutorial make up on her you could instantly see an inner diva to appear. She had a vintage dress on and glamour make up would through us back to the era...


 Just stunning!
 Check out my lovely Irish Model Aisling she rocked the 50's look:

Every day at this course was filed with inspirations and explanations about why and how the make up would progress with time.
1960's, 1970's and 1980' even little catch up on 1990's were like an amazing journey. We all from different places of our planet took together and enjoyed every single bit of it.
Twiggy anyone?


 We all have an absolute 1960's on our faces and there is no matter what colour is your skin or where on Earth are you from )))
1970's were a very Disco Diva era and I got to play a role:

 And shocking 1980's. Thank you to my lovely model Francesca Epinati she made my life so easy.
Different subcultures did emerge in 1980's:
 The main look did pull of Madonna. It is an iconic look you'll go too in order to replicate the 80's


Such an experience! So many lovely people! Wish I've gotten all contacts. Hope we'll keep in touch and show the world how it's done!
 This is only the beginning! I wish all the best to all people and hope to see you all again soon!
Look out for swatches and new make up looks ;)
I just came back from London after taking Vintage Glamour Course at Illamasqua School of Make Up Art and I just loved it!
New people, new products, new textures...and it all combined into new knowledge. I can not wait to experiment with all the products I've bought (believe it or not I would take one of everything if I could) applying all new I've learned and making it wearable for everyday life.
But the best part of it all is the fact I got to spend 3 days with people who are like me! We have one major thing in common and it is our passion for Make up. It had no difference where are you from, how good or bad your English is....Everybody understood and shared each others interest. We wanted to learn how make up transformed into what it is now and WE DID!
We started from 1920's where Great Depression, silent movies and the fact that make up just only became available to women played significant role in what we could see on a woman face of that era.
I had great pleasure to be a model for that era. And believe it or not but had a funniest time walking around London Soho with half of my face done...People would stare, laugh, frown...it did not matter!
After lunch we had to practice what we were shown...It was not easy as you'd imagine but when you succeed it does feel great.
Thank you to lovely teacher, Ben, he had patience to guide everyone of us and we all did fantastic.
Next we moved on to 1930's where Depression look has been removed by happy faces and where starting point for Glamour of 1950's ...
You can see how eyebrows can change your whole appearance in seconds...Amazing!
1940's were a transition period for 1950's glamour.
We had an amazing model for 1950's Andrea De La Cruz she is a young Make up Artist from California. Has a beautiful face and very good skills. But when Ben did a tutorial make up on her you could instantly see an inner diva to appear. She had a vintage dress on and glamour make up would through us back to the era...
Every day at this course was filed with inspirations and explanations about why and how the make up would progress with time.
1960's, 1970's and 1980' even little catch up on 1990's were like an amazing journey. We all from different places of our planet took together and enjoyed every single bit of it.
Twiggy anyone?
1970's were a very Disco Diva era and I got to play a role:
Different subcultures did emerge in 1980's:
Such an experience! So many lovely people! Wish I've gotten all contacts. Hope we'll keep in touch and show the world how it's done!
Look out for swatches and new make up looks ;)
Subscribe to:
Comments (Atom)